Your first Macroquad app

Now it’s time to develop your first application with Macroquad. Start by installing the programming language Rust if you don’t already have it.
Implementation
Create a new Rust project using the Cargo command line tool and add
macroquad with version 0.4 as a dependency. If you want, you can give your
game a more interesting name than “my-game”.
cargo new --bin my-game
cd my-game/
cargo add macroquad@0.4
Your Cargo.toml file should now look like this:
[package]
name = "my-game"
version = "0.1.0"
edition = "2024"

# See more keys and their definitions at https://doc.rust-lang.org/cargo/reference/manifest.html

[dependencies]
macroquad = "0.4"
Open the file src/main.rs in your favorite text editor and change the
content to look like this:
use macroquad::prelude::*;

#[macroquad::main("My game")]
async fn main() {
    loop {
        clear_background(DARKPURPLE);
        next_frame().await
    }
}
Run your application with cargo run, and a new window with a dark purple
background will open once the compilation has finished.
Description of the application
The first line is used to import everything you need from Macroquad. This is
most easily done by importing macroquad::prelude::*, but it is also possible to
import only the features that are used.
The attribute #[macroquad::main("My game")] is used to tell Macroquad which
function will be run when the application starts. When the application is
started, a window will open with the argument as the title, and the
function will be executed asynchronously. If you have named your game
something more interesting you should change the text `My game´ to the name of
your game.
To change the configuration for the window, such as the size or whether it should start in fullscreen mode, you can use the struct Conf instead of the string as an argument.
Inside the main function there is a loop that never ends. All the game logic
will be placed inside this game loop and will be executed in every frame. In our
case we clear the background of the window with a dark purple color with the
function clear_background(DARKPURPLE). At the end of the loop is the
function next_frame().await which will wait until the next frame is
available.
Even if clear_background() isn’t used explicitly, the screen will be cleared
with a black color at the start of each frame.
Try changing the background of the window to your favorite color.
Publish on the web (if you want)
One of the big advantages with Rust and Macroquad is that it is very easy to compile a standalone application for different platforms. How this works will be explained in a later chapter of this guide. If you want, you can setup a GitHub deploy action to publish a web version of the game every time you commit.
When you created the game with cargo new a local Git repository was also
created. Start by committing your changes locally. After that you can create a
repository on GitHub and push the code there.
The two files below refer to my-game.wasm. If you’ve changed the name of
your crate to something other than my-game you need to change those
references.
You need an HTML file to show the game. Create a file called index.html in
the root of the project/crate and add the following content:
<!DOCTYPE html>
<html lang="en">
<head>
    <meta charset="utf-8">
    <meta name="viewport" content="width=device-width, initial-scale=1" />
    <title>My Game</title>
    <style>
        html,
        body,
        canvas {
            margin: 0;
            padding: 0;
            width: 100%;
            height: 100%;
            overflow: hidden;
            position: absolute;
            background: black;
            z-index: 0;
        }
    </style>
</head>
<body>
    <canvas id="glcanvas" tabindex='1'></canvas>
    <!-- Minified and statically hosted version of https://github.com/not-fl3/macroquad/blob/master/js/mq_js_bundle.js -->
    <script src="mq_js_bundle.js"></script>
    <script>load("my-game.wasm");</script> <!-- Your compiled WASM binary -->
</body>
</html>
The following GitHub Actions Workflow will compile the game to WASM and put
all files in place so that the game will work on the web. Place the code in
.github/workflows/deploy.yml.
name: Build and Deploy
on:
  push:
    branches:
      - main # If your default branch is named something else, change this

permissions:
  contents: write
  pages: write

jobs:
  build-and-deploy:
    runs-on: ubuntu-latest
    steps:
      - name: Checkout
        uses: actions/checkout@v2

      - name: Install Rust
        uses: actions-rs/toolchain@v1
        with:
          toolchain: stable
          target: wasm32-unknown-unknown
          override: true

      - name: Build
        run: cargo build --release --target wasm32-unknown-unknown

      - name: Prepare Deployment Directory
        run: |
          mkdir -p ./deploy
          cp ./target/wasm32-unknown-unknown/release/my-game.wasm ./deploy/
          cp index.html ./deploy/

      - name: Deploy
        uses: peaceiris/actions-gh-pages@v3
        with:
          github_token: ${{ secrets.GITHUB_TOKEN }}
          publish_dir: ./deploy
Commit and push! You can follow the build under the Actions page of the
repository. The first time you push your code the game will be built and all
files placed in the correct place, in the root of the branch gh-pages, but
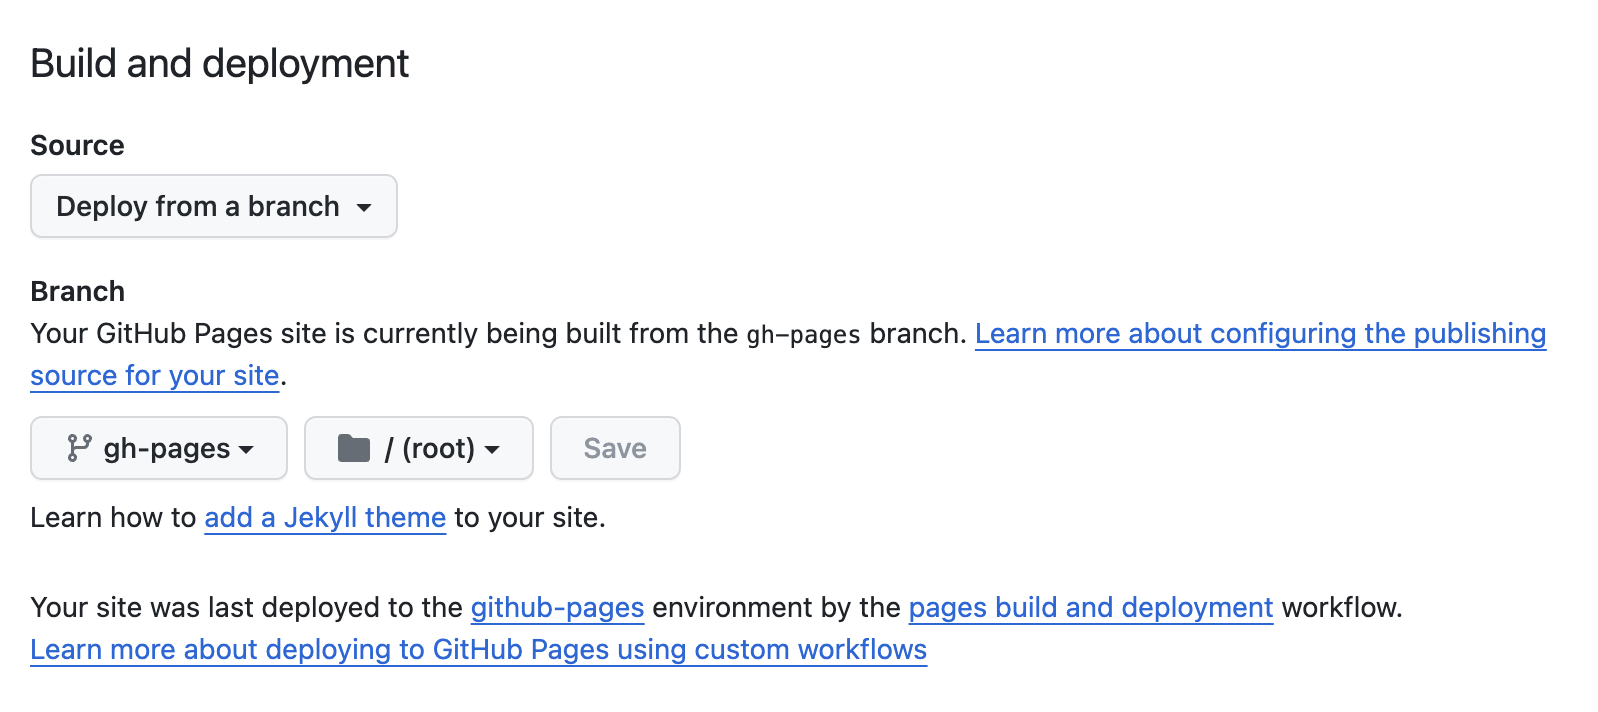
no web page will be created. You need to change a configuration of the GitHub
repository under Settings > Pages > Build and deployment. Set
gh-pages as the branch from which to deploy the web page.

When the build is done you will be able to play your game on
https://<your-github-account>.github.io/<repository-name>.
It won’t be much of game yet, only a purple background. But you have delivered early, and the project is configured for continuous delivery. Every time you add functionality to the game and push the code to GitHub, you will be able to play the latest version of the game on the web. In the next chapter things will start to move!
